


Nowadays, displaying a list of data is a common function present in several types of mobile applications, such as social, contacts, e-commerce, news, and financial apps. When it comes to large amounts of data, the efficiency it’s displayed within your app is important for maintaining good performance.
In this article, I’ll walk you through using two methods of listing data in a React Native app: displaying the list with map and using the FlatList component.
The map method technically gives you more flexibility to customize your list the way you want with the React Native ScrollView component but it loads all the items every time which can be expensive.
FlatList is a React Native component that only loads items that are currently visible on the screen and it deletes items as they go off screen which is more optimal for large amounts of data. Furthermore, it provides scrolling features by default. You don’t need to use extra components like ScrollView to make list data scrollable. The FlatList component also comes with the following features automatically:
Header section
Footer section
Horizontal scrolling
Separator
Pull to refresh
Scroll loading
Scroll to a specific position in the list
Multiple column support
Under the hood, FlatList uses the ScrollView component to render scrollable elements. However, unlike generic ScrollView, FlatList displays data lazily to save memory and processing time.
Let’s begin with the first method of rendering list data in a React Native app using the map function.
Displaying a List in React Native with Map
For the first method, you can use the JavaScript map method to cycle through an array of data, compute each array item, and display it in a React Native app.
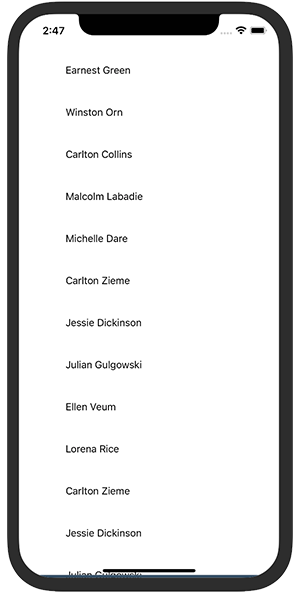
Let’s take a sample of a list of personal data with name and ID:
const persons = [
  {
    id: "1",
    name: "Earnest Green",
  },
  {
    id: "2",
    name: "Winston Orn",
  },
  {
    id: "3",
    name: "Carlton Collins",
  },
  {
    id: "4",
    name: "Malcolm Labadie",
  },
  {
    id: "5",
    name: "Michelle Dare",
  },
  {
    id: "6",
    name: "Carlton Zieme",
  },
  {
    id: "7",
    name: "Jessie Dickinson",
  },
  {
    id: "8",
    name: "Julian Gulgowski",
  },
  {
    id: "9",
    name: "Ellen Veum",
  },
  {
    id: "10",
    name: "Lorena Rice",
  },

  {
    id: "11",
    name: "Carlton Zieme",
  },
  {
    id: "12",
    name: "Jessie Dickinson",
  },
  {
    id: "13",
    name: "Julian Gulgowski",
  },
  {
    id: "14",
    name: "Ellen Veum",
  },
  {
    id: "15",
    name: "Lorena Rice",
  },
Now to render all data on the app screen, you can loop through it and wrap it in a UI component using the below code:
export default function App() {
  return (
    <View style={styles.container}>
      {persons.map((person) => {
        return (
          <View>
            <Text style={styles.item}>{person.name}</Text>
          </View>
        );
      })}
    </View>
  );
}

//styles to see the data more clearly

const styles = StyleSheet.create({
  container: {
    flex: 1,
    padding: 50,
  },
  item: {
    padding: 20,
    fontSize: 15,
    marginTop: 5,
  }
});
But you can’t see all the data because the list is not scrollable. Hence, to make a scrollable list of data, you also need to put the View component inside the ScrollView component.
Note: ScrollView must have a parent with a defined height.
The ScrollView is a generic React Native scrolling container that allows both vertical and horizontal direction scrolling. By default, it displays its children vertically in a column because the horizontal prop value is set to false. If you want your elements to be arranged horizontally in a single row, you can set the horizontal value to true.

Displaying a List with a React Native FlatList
The FlatList component requires two props: data and renderItem. A data prop takes an array of data that needs to be rendered, and renderItem defines a function that takes data via parameters and returns a formatted component to be displayed on the screen.
The basic code to implement FlatList for the list of person data is as follows:

If you run the app with the above code, you might notice a warning that tells you to add unique keys to each list item. To resolve this issue, you first need to decide on a particular piece of data to use as a unique key, like ID or email address, and then specify it using the keyExtractor prop in FlatList.
The basic code to use FlatList with keyExtractor, data, and renderItem will look like this:
import React from "react";

import { SafeAreaView, FlatList, StyleSheet, Text, View } from "react-native";

const persons = [ /* list of person data from earlier */ ];

export default function App() {

  return (
    <SafeAreaView style={styles.container}>
      <FlatList
        data={persons}
        renderItem={({ item }) => <Text style={styles.item}>{item.name}</Text>}
        keyExtractor={(item) => item.id}
      />
    </SafeAreaView>
  );
}

const styles = StyleSheet.create({
  container: {
    padding: 50,
    flex: 1,
  },
  item: {
    padding: 20,
    fontSize: 15,
    marginTop: 5,
  }
});
Now put it all together and it will look like this:
import React from "react";
import { SafeAreaView, FlatList, StyleSheet, Text, View } from "react-native";

const persons = [
/* List of person data from earlier */
];

export default function App() {

  const myItemSeparator = () => {
    return <View style={{ height: 1, backgroundColor: "grey",marginHorizontal:10}} />;
    };

  const myListEmpty = () => {
    return (
      <View style={{ alignItems: "center" }}>
      <Text style={styles.item}>No data found</Text>
      </View>
    );
  };

return (
  <SafeAreaView style={styles.container}>
    <FlatList
      data={persons}
      renderItem={({ item }) => <Text style={styles.item}>{item.name}</Text>}
      keyExtractor={(item) => item.id}
      ItemSeparatorComponent={myItemSeparator}
      ListEmptyComponent={myListEmpty}
      ListHeaderComponent={() => (
        <Text style={{ fontSize: 30, textAlign: "center",marginTop:20,fontWeight:'bold',textDecorationLine: 'underline' }}>
          List of Persons
        </Text>
      )}
      ListFooterComponent={() => (
        <Text style={{ fontSize: 30, textAlign: "center",marginBottom:20,fontWeight:'bold' }}>Thank You</Text>
      )}
    />
  </SafeAreaView>
  );
 }

const styles = StyleSheet.create({
  container: {
    flex: 1,
    marginTop: 5,
    fontSize: 30,
  },
  item: {
    padding: 20,
    marginTop: 5,
    fontSize: 15,
  },
});
React Native FlatList is Easier and Cheaper to Use :
Displaying data using map or other loop methods may give you flexibility to customize the list the way you want, but as the amount of data grows, you also need to take extra care of the bulk data you render on the visible screen.

FlatList makes handling complex and large amounts of list data easy and effortless. Also extra effort is not required to implement lazy loading in the React Native app — FlatList takes care of it by default. You can read more about the FlatList component in the Expo or React Native docs.
Thanks for reading! Happy Developing.